3D Nail Art Guide: How to Create Raised Designs
If you don’t know what 3D nail art is, then you are about to be enlightened and extremely happy. 3D nail designs can be the prettiest artwork you can get on your nails but it is also the most time-consuming one. This type of a design is created on your acrylic nails or just fake nails in general. It looks the best when you have longer nails and sturdier nails. However, this may be hard for you to achieve unless you are not a professional.
Learn to Create 3D Nail Art at Home
You need to start with colored nails. It can be any color you love, doesn’t matter if it is glossy or matte. Then you will add your beloved piece on top by using the nail glue. You will have to do it slow and steady because often those masterpieces can break in half. Heads up since these applications can be pricey if done at the salon. Don’t be shocked if a posh manicure like this costs $60. But hey, it is worth it. Just look at the following beauties.
Create More Floral 3D Nail Art Designs- Watch Video Tutorial
3D Nail Art Possibilities
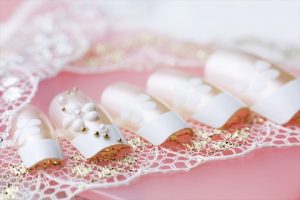
#1: The Flower
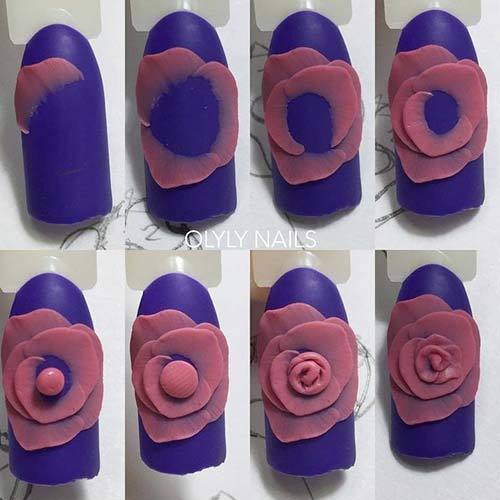
If you are going to do a 3D nail design, go for the flowers. They are one of the most stunning and peaceful designs that women like to go for. That is because the petals and the leaves leave an amazingly fresh and spring look.
If you are going to form a flower art on your own here is how to do it. Firstly, get the:
- Acrylic mixture
- Aluminum foil
- Clear polish
- Nail polish color for your flower
- Pin
Paint two layers of your chosen nail polish and let it dry. If you like your nails matte then just use a matte nail polish, if not then a glossy one will do. You will create the petals as well as the flower by using an acrylic mixture. Make a small ball with the powder and place it in the middle of your aluminum foil. Layer your petals one by one, and always wait for the previous one to dry down, that way you won’t ruin the whole design. You will create a center of the flower by placing a bigger dot in between the petals. Press the design down lightly, and then use a pin to create little swirls on top of the flowers. Voila, your flowery design is now a true masterpiece.
Take Inspiration From This Solar Nail Designs
#2: Infamous Bow
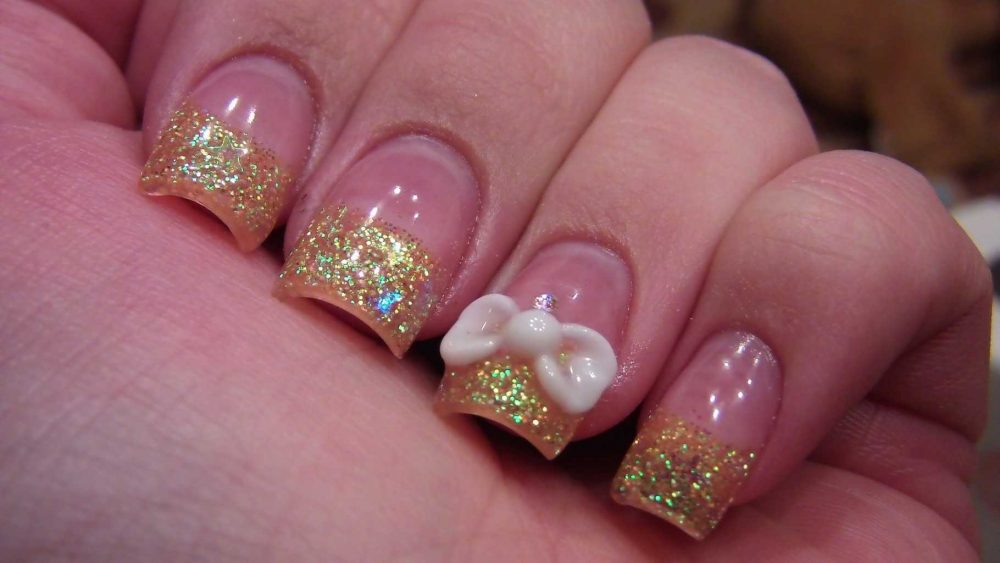
We’ve all seen the little bow on top of the nail design pretty much everywhere. For some reason, this 3D nail design took off easily, and women are loving it more and more each day. If you are one of them, get yourself:
- Acrylic mixture
- Clear Nail Polish
- Ribbon
Start by painting your nails with your favorite clear nail polish as a base. With your glue apply the bow onto your preferred nail. If you don’t own an already made bow, you can create one on your own. Get your aluminum foil and with your acrylic powder step by step (as well as you did with the flowers) create the bow of your own shape and size. After everything is glued down, give them a final coat of a clear nail polish. This will help to seal the deal.
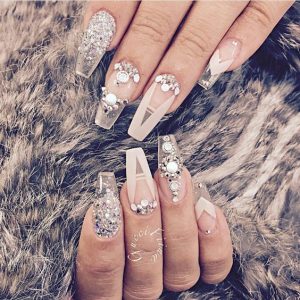
#3: High-Class Gems
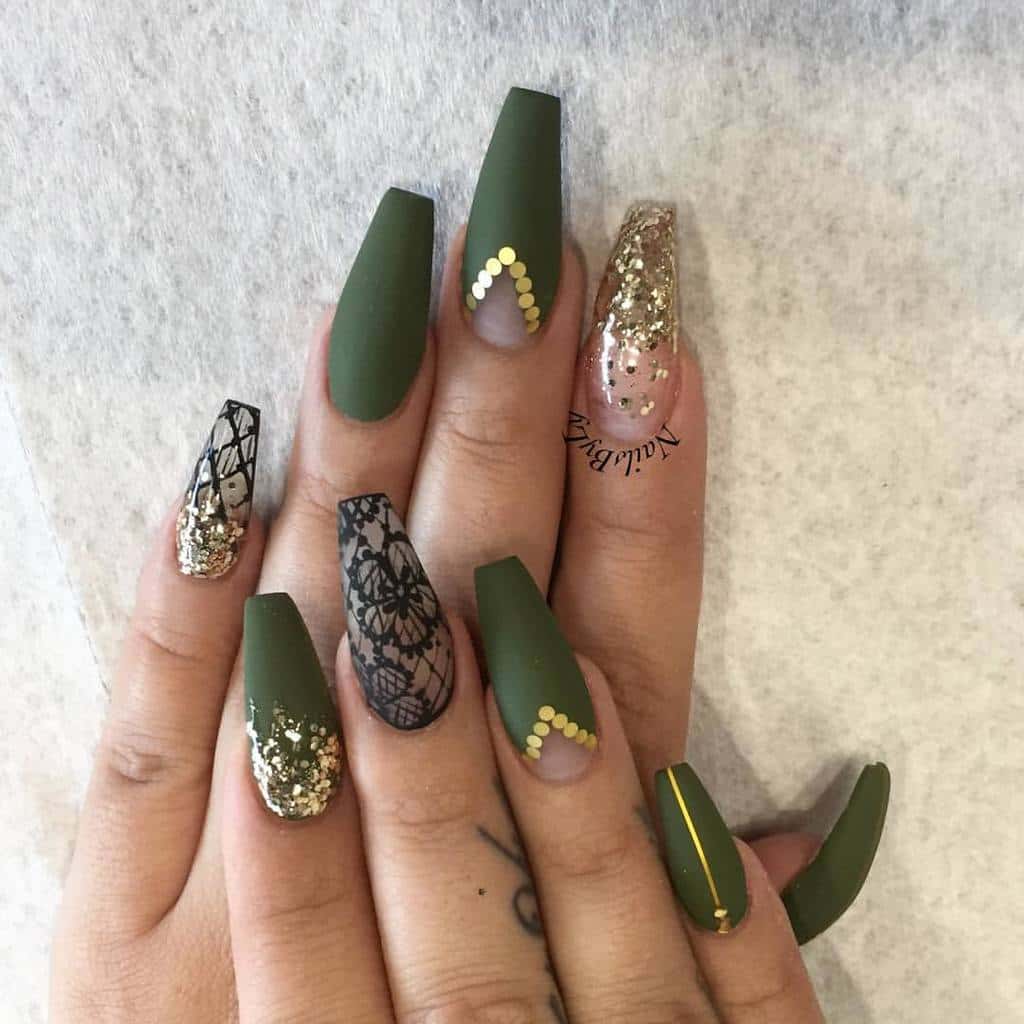
Are you feeling like a princess who is worth a million bucks? Of course, you do! If this 3D nail art speaks to you the most, here is how to do it.
You will be needing:
- A lot of gems and jewels
- Clear nail polish
- Nail polish of your choice
- Studs
It would be the best if you had a dual-toned nail polish for this one. Those can be found at Ulta or any bigger drugstore, and they are not that pricey. If you don’t feel like searching for this nail polish you can use any darker color that you love. In our case, this dirty green one was the hottest. Add two coats of that one as your base.After that dries down, use two gems that you will apply with your tweezers (especially if they are smaller pieces.) Always start with the bigger gems, and when you see how much of the space is left for the small ones apply them there. Glue them down and cover them in a top coat so they don’t fall off on you.
#4: Checkered Nails
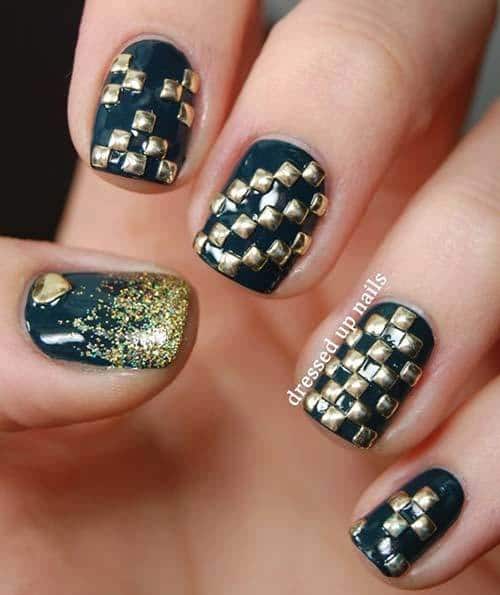
This old vibe is still trending. It was forever since we’ve seen someone playing checkers, but that doesn’t mean that this 3D nail design is any less important or pretty.
Get some:
- Any colored polish as a background
- Clear polish
- Gold Studs
- Tweezers
- White or black studs as well
Apply your wanted base color two times. Now, once you have the base on, apply a clear polish. You will do that since it will serve you as an adhesive for the gems. While it is still wet, work your way with the golden studs and apply them with your tweezers. You will have to apply the studs from the top to the bottom and make it into a checkered pattern. If you are feeling wild, you can also place glitter for fun on your ring finger as well as the thumb.
#5: Nails With Small Rhinestone
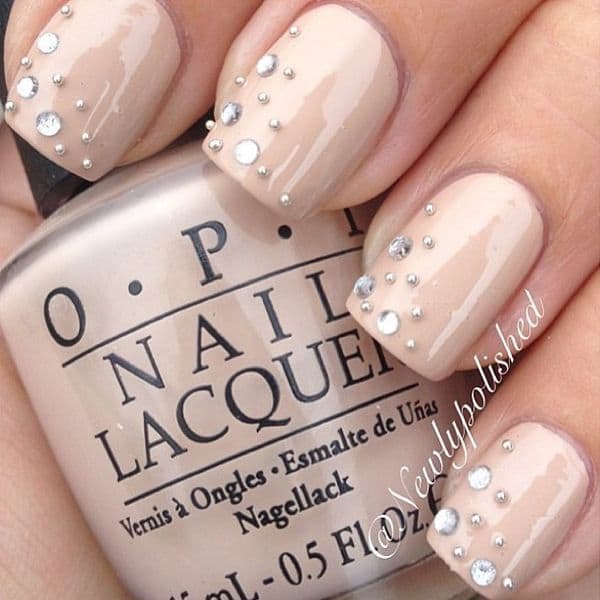
If you are a person who doesn’t like big and flashy manicures, get yourself a small rhinestone one. It is super elegant and so easy to do.
You will be needing:
- A one mono-color nail polish
- A lot of silver rhinestones
- As always, a clear nail polish and tweezers
Use your wanted base nail polish and apply it twice. We think that this OPI one looks stunning, would you agree? Anyways, wait for it to dry completely so you can use a clear nail polish. Again, leave the clear polish wet and then apply your silver rhinestones wherever you prefer to have that subtle glow. It is the best for your rhinestones to be small and not too chunky. Add them one by one with the help of tweezers. Arrange a whole set of little ones and they will look magical.
Love Squoval Nail Shape? You’ll Love These Nail Designs
Isn’t it hard to resist the beautiful 3D nail designs? And those are just some of the designs you can go for. We believe that you will have a blast when rocking these when you go out. And guess what else? Men love this artwork too! They believe that your nails look super feminine and classy, so there is one more reason for you to get them.